

Your feet are the foundation of your entire body, and when they aren't properly supported, it can create a chain reaction of discomfort from your ankles to your back. Foot pronation, the natural inward roll of the foot as it strikes the ground, is a normal part of walking and running. However, when this roll becomes excessive-a condition known as overpronation-it can contribute to issues like flat feet, plantar fasciitis, and shin splints.
The good news is that you're not powerless. Just like any other part of your body, the muscles supporting your feet can be strengthened. This article will guide you through a curated list of the most effective foot pronation exercises. We'll move beyond generic advice to provide detailed, actionable steps for exercises like the Short Foot, Towel Scrunch, and Calf Raises. These movements will help you build a stronger, more stable foundation from the ground up, reducing pain and improving your overall biomechanics.
While these exercises are highly targeted, remember that overall physical health plays a key role. Beyond specific foot-focused movements, exploring broader topics in physical activity can contribute to your overall well-being. For more insights into general exercise information, you can find resources to support your journey. Ready to take the first step toward healthier feet?
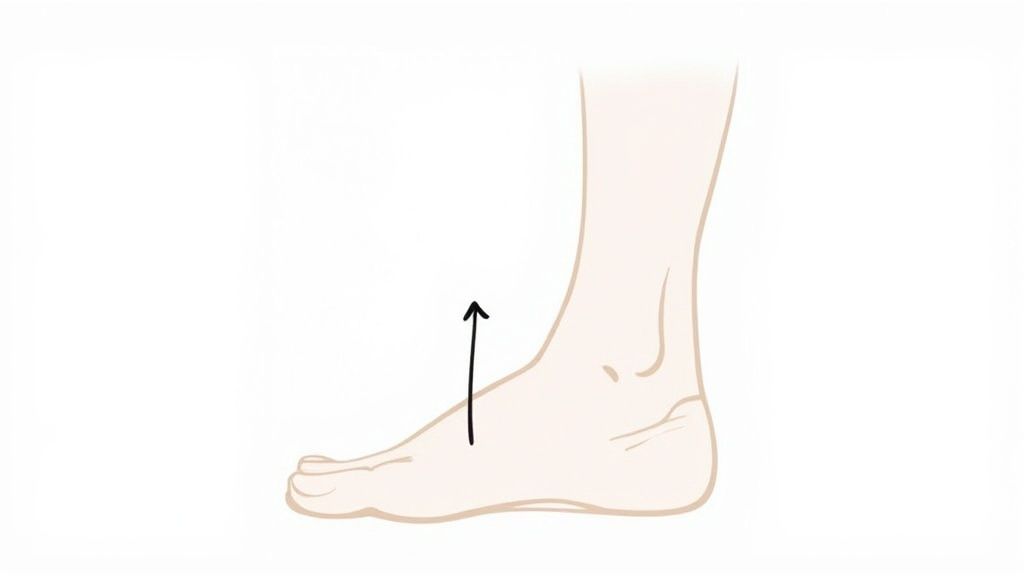
1. Short Foot Exercise
The Short Foot Exercise is often considered the cornerstone of any effective program targeting overpronation. It's a foundational isometric movement designed to activate and strengthen the intrinsic muscles of the foot, specifically those that support the medial longitudinal arch. Think of it as doing a crunch for your foot's core; you are actively engaging deep, supportive muscles without much visible movement.
This exercise, championed by researchers like Dr. Irene Davis of Harvard Medical School, helps retrain your neuromuscular system to create a stable, dome-like arch. By consistently practicing this, you build an internal "truss" that provides natural support, reducing the excessive inward rolling characteristic of overpronation. Its effectiveness has made it a staple in professional settings, from NBA injury prevention programs to standard physical therapy protocols for conditions like plantar fasciitis.
How to Perform the Short Foot Exercise
Follow these steps to master the movement pattern correctly, which is crucial for making it an effective foot pronation exercise.
- Starting Position: Begin seated in a chair with your feet flat on the floor and your knees bent at a 90-degree angle. Ensure your foot is in a neutral position, not tilted inward or outward.
- The Contraction: Without curling your toes or lifting your heel, try to shorten your foot by drawing the ball of your foot back toward your heel. Imagine you are trying to lift your arch up toward the ceiling.
- Hold and Release: You should feel a contraction or mild cramping in the arch of your foot. Hold this position for 5 to 10 seconds while maintaining normal breathing.
- Relax and Repeat: Gently release the contraction and let your foot relax completely. Aim for 10-15 repetitions on each foot.
Tips for Success
- No Toe Curling: The biggest mistake is using your long toe flexor muscles instead of the deep intrinsic muscles. Keep your toes long, flat, and relaxed on the floor throughout the exercise.
- Start Seated: Mastering the movement while sitting removes the challenge of balance and body weight, allowing you to focus purely on the muscle contraction.
- Progress Gradually: Once you can perform the exercise correctly while seated, progress to standing on both feet. The final challenge is performing the short foot exercise while standing on a single leg, which significantly increases the demand for stability.
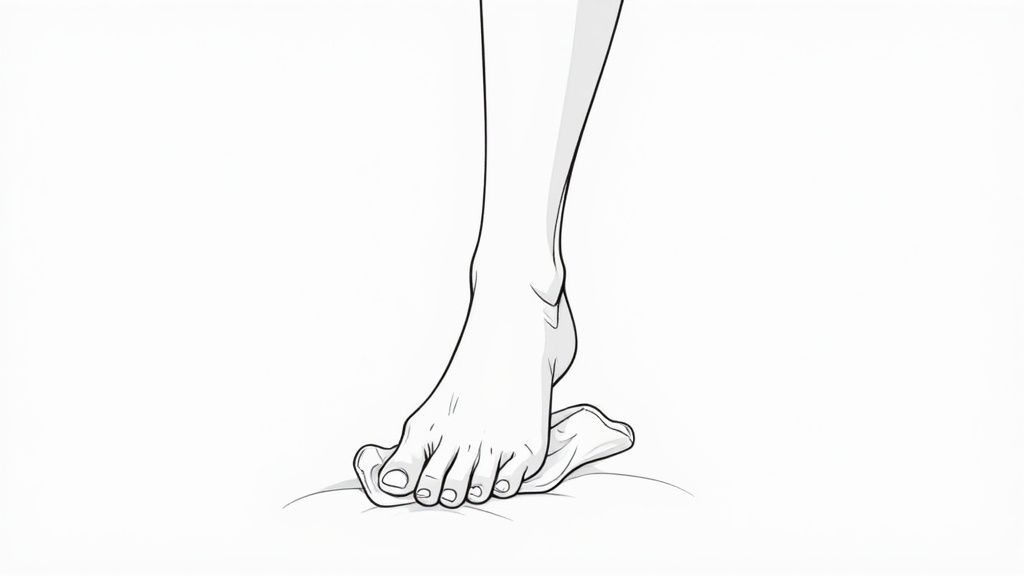
2. Towel Scrunch Exercise
The Towel Scrunch is a classic and highly effective exercise for building strength in the smaller muscles of the foot. It directly targets the toe flexors and intrinsic foot muscles, which are crucial for gripping the ground and maintaining a healthy arch. By actively pulling a towel towards you with just your toes, you are essentially training your foot to provide its own stability from the ground up.
This movement is widely recommended by podiatric medical associations and physical therapists for its simplicity and impact. Its role in improving foot strength and dexterity makes it a standard component in runner rehabilitation protocols, diabetes foot care programs, and even fall prevention programs for the elderly. As one of the most accessible foot pronation exercises, it helps improve the muscular endurance needed to resist the foot's inward collapse during daily activities like walking and running.
How to Perform the Towel Scrunch Exercise
Follow these steps carefully to ensure you are engaging the correct muscles and getting the full benefit of this powerful exercise.
- Starting Position: Sit in a chair with your feet flat on the floor, knees bent at 90 degrees. Place a small towel on the floor in front of you, with the short edge just under your toes.
- The Scrunch: Keeping your heel firmly on the ground, use only your toes to curl and bunch the towel, pulling it toward your heel.
- Gather the Towel: Continue this scrunching motion until you have gathered the entire length of the towel underneath your foot.
- Reset and Repeat: Straighten the towel back out and repeat the process. Aim for 3-5 full repetitions (gathering the entire towel) for each foot.
Tips for Success
- Keep Your Heel Planted: The power should come entirely from your toes and the arch of your foot. Avoid lifting your heel or using your leg to assist in pulling the towel.
- Use All Toes: Try to engage all five toes in the scrunching motion, not just your big toe. This ensures you are strengthening the entire forefoot.
- Progress the Challenge: Once the basic movement feels easy, you can increase the difficulty by placing a small weight, like a book or a canned good, on the far end of the towel.
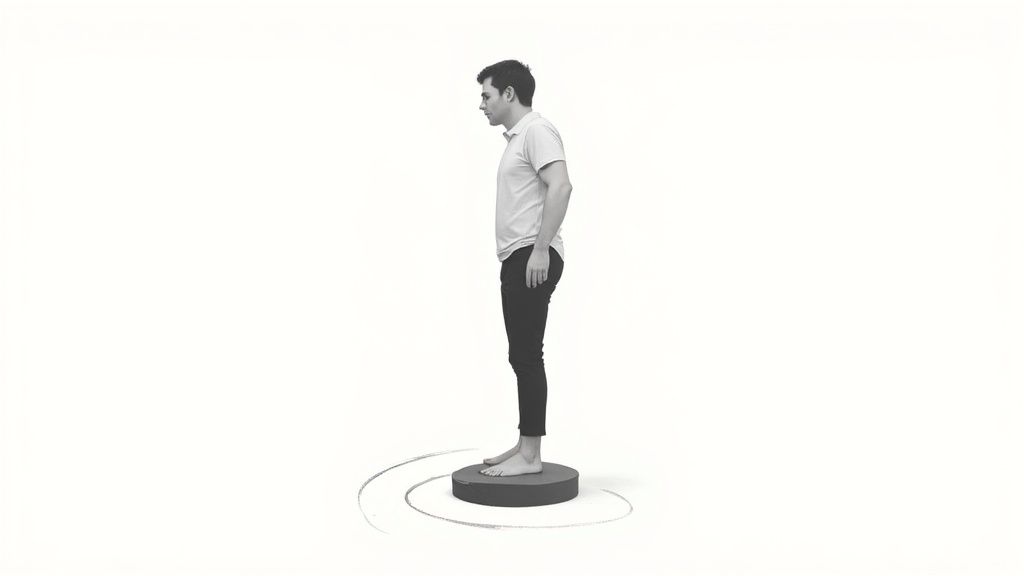
3. Single-Leg Balance on Unstable Surface
Building on foundational strength, the Single-Leg Balance on an Unstable Surface introduces a proprioceptive challenge that is crucial for dynamic foot control. This exercise forces the small intrinsic muscles of your foot and ankle stabilizers to work overtime, constantly making micro-adjustments to maintain your balance. By doing so, it trains your foot to resist the tendency to roll inward (pronate) when faced with unpredictable ground.
Popularized by sports medicine physicians and athletic performance coaches, this method is a staple in everything from ACL injury prevention programs to vestibular rehabilitation. The unstable surface, whether it's a foam pad, BOSU ball, or balance disc, mimics real-world conditions like uneven terrain. This makes it one of the most functional foot pronation exercises you can perform, directly translating to better stability during walking, running, and sports.
How to Perform the Single-Leg Balance
Mastering this exercise is about progression. Start simple and add difficulty only when you feel stable and confident.
- Starting Position: Begin by standing on one foot on a firm, flat surface to establish your baseline balance. Keep a slight bend in your knee and your hands on your hips or out to your sides for balance.
- Introduce Instability: Once comfortable, step onto an unstable surface like a thick foam pad or a balance disc with one foot.
- Find Your Balance: Actively work to keep your foot stable and your arch from collapsing. Focus on keeping your ankle, knee, and hip in alignment. You will feel the muscles in your foot and lower leg firing rapidly.
- Hold and Repeat: Hold the position for 30 to 60 seconds, focusing on maintaining control. Switch to the other foot and repeat. Aim for 2-3 sets on each leg.
Tips for Success
- Progress Slowly: Don't jump straight to a wobbly surface. Master balancing on a firm floor first, then a pillow, then a foam pad, and finally a balance disc or BOSU ball.
- Focus on Your Arch: Consciously try to maintain your foot's arch. It's easy to let it collapse as you fight for balance. You can even combine this with a light "short foot" contraction.
- Challenge Your Senses: Once you can hold your balance with your eyes open, try closing them. This removes visual feedback and forces your foot and ankle proprioceptors to work even harder.
- Relieve Post-Exercise Fatigue: This exercise can tire out your foot muscles. For more information on post-workout care, you can learn more about relieving tired feet.
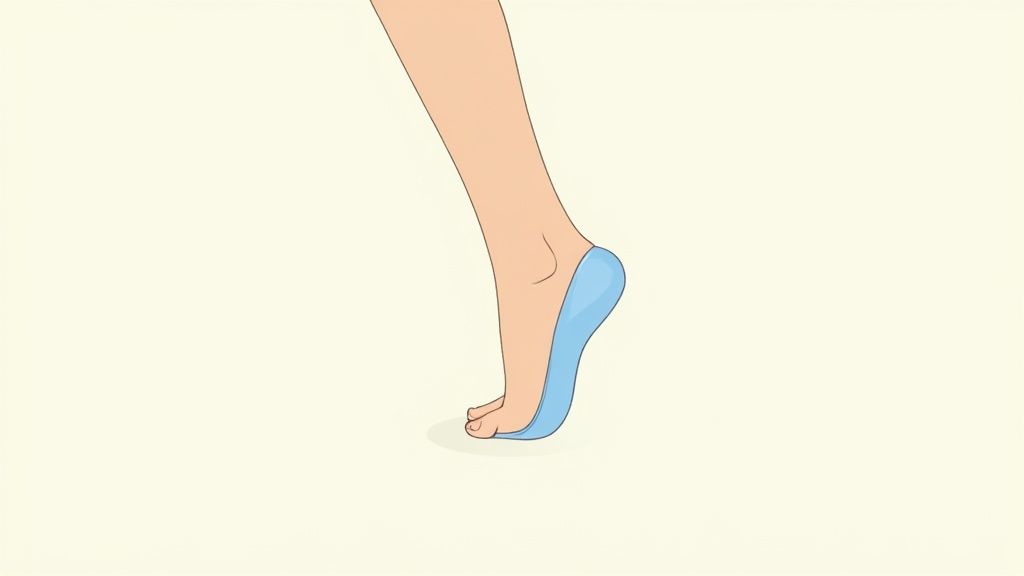
4. Calf Raises with Arch Focus
Calf raises are a common lower leg strengthener, but the "Calf Raise with Arch Focus" transforms this simple movement into a powerful corrective tool for overpronation. This modified version specifically targets the posterior tibialis muscle, a key stabilizer that runs down the inside of the lower leg and attaches to the underside of the foot, acting as a primary support for the medial arch. By consciously maintaining arch height during the raise, you are training this muscle to prevent the ankle from rolling inward.
This exercise is a staple in sports medicine and rehabilitation for its dual benefits of strengthening the calf muscles (gastrocnemius and soleus) while actively reinforcing proper foot mechanics. It’s frequently used in training programs for runners to improve push-off efficiency and in conditioning for dancers to build ankle stability. By integrating this focused movement, you are not just building strength but also re-educating your foot and ankle to function in a more biomechanically sound way, making it an excellent foot pronation exercise.
How to Perform Calf Raises with Arch Focus
Follow these steps to ensure you are engaging the correct muscles and not reinforcing poor movement patterns.
- Starting Position: Stand with your feet hip-width apart, parallel to each other. You can place your hands on a wall or chair for balance.
- Initiate the Lift: Before you rise, actively lift your arches slightly, creating a stable foot posture. Focus on distributing your weight evenly across your foot.
- The Raise: Slowly press through the balls of your feet, focusing the pressure on your big toe and second toe. Rise up onto your tiptoes, ensuring your ankles do not roll outward and your arches remain lifted.
- Hold and Lower: Pause at the top for 2-3 seconds, feeling the contraction in your calves and the engagement in your arches. Slowly lower yourself back down with control, taking about three seconds for the descent. Aim for 2-3 sets of 10-15 repetitions.
Tips for Success
- Mind the Push-Off: The key is to push through the big toe. Allowing the pressure to shift to the outer toes causes the ankle to roll out (supinate), defeating the exercise's purpose.
- Control the Descent: The lowering phase (eccentric contraction) is just as important as the lift. Avoid dropping down quickly; a slow, controlled descent builds significant strength and stability.
- Maintain Arch Height: Do not let your arch collapse at the bottom of the movement. Keep it subtly engaged throughout the entire set to maximize the benefits.
- Progress to Single-Leg: Once you master the double-leg version, progress to single-leg calf raises to increase the challenge and further improve your balance and arch control. For more ideas, you can explore other foot stretches for flat feet on samuraiinsoles.com.
5. Marble Pick-Up Exercise
The Marble Pick-Up Exercise is a classic and highly effective movement for developing fine motor control and strengthening the small, intrinsic muscles within the foot. While it may seem simple, this task requires precise coordination and flexion of the toes, which directly engages the muscles that support your foot's arch. By challenging these muscles to grasp and manipulate objects, you are actively working against the muscular weakness that contributes to overpronation.
This exercise is widely utilized by occupational therapists and in podiatric rehabilitation to improve toe dexterity and grip strength. It's also a common component of diabetic foot care programs, where maintaining foot health and circulation is critical. For someone looking for effective foot pronation exercises, this movement retrains the foot to be more active and supportive, improving its ability to function correctly during gait and standing.
How to Perform the Marble Pick-Up Exercise
Follow these steps to ensure you are targeting the correct muscles and getting the most benefit from this exercise.
- Starting Position: Sit in a chair with your feet flat on the floor. Place a small pile of marbles (or other small objects like pebbles or Lego pieces) on the floor next to one foot and an empty bowl or cup nearby.
- Grasp the Object: Using only your toes, reach down and pick up one marble. Focus on curling your toes to secure the object firmly.
- Lift and Place: Keeping your heel on the floor, lift your forefoot and the marble off the ground. Carefully move your foot over the bowl and release the marble into it.
- Repeat: Continue this process until you have moved all the marbles from the pile into the bowl. Aim to complete one set of 15-20 repetitions before switching to the other foot.
Tips for Success
- Start with Larger Objects: If marbles are too challenging at first, begin with slightly larger, easier-to-grip items like a crumpled piece of paper or a small towel before progressing.
- Engage All Toes: Make a conscious effort to use all of your toes to grasp the object, not just your big toe. This ensures you are strengthening the entire complex of intrinsic muscles.
- Stay Controlled: Avoid rushing the movement. The benefit comes from the slow, controlled action of grasping, lifting, and releasing the object, which maximizes muscle engagement.
- Combine for Best Results: This exercise pairs perfectly with other movements like the Short Foot Exercise. Using them together creates a more comprehensive strengthening program for combating foot pronation.
6. Posterior Tibialis Strengthening
Strengthening the posterior tibialis muscle is a crucial component of any comprehensive plan to correct overpronation. This muscle is the primary dynamic stabilizer of the foot's medial arch, acting like a powerful sling that holds the arch up and prevents the foot from collapsing inward during weight-bearing activities. When this muscle is weak, the arch flattens, leading directly to the excessive inward roll characteristic of overpronation.
Often called the gold standard in non-surgical flat foot treatment, targeted exercises for this muscle are a staple in physical therapy and sports medicine. Promoted by organizations like the American Orthopaedic Foot & Ankle Society and championed by surgeons like Dr. John Baxter, this approach is foundational for both rehabilitating injuries like posterior tibial tendon dysfunction and preventing them in the first place, especially among runners. By building endurance and strength in this muscle, you provide your foot with the active support it needs to maintain proper alignment.
How to Perform Posterior Tibialis Strengthening
Follow these steps for the classic resistance band inversion, a highly effective foot pronation exercise.
- Starting Position: Sit on the floor with your legs extended in front of you. You can also sit in a chair. Cross your affected leg over the opposite knee. Loop a resistance band around the ball of the affected foot and anchor the other end of the band on your other foot to create tension.
- The Contraction: Keeping your leg and knee still, slowly rotate your foot inward and upward against the band's resistance. This movement, called inversion, directly targets the posterior tibialis.
- Hold and Release: Focus on a slow, controlled motion. Pause for a second at the peak of the contraction, feeling the muscle work along the inside of your shin and arch.
- Relax and Repeat: Slowly return to the starting position. Aim for 2-3 sets of 12-15 repetitions on each foot. You can find more details about how Posterior Tibialis Strengthening helps with overpronation on samuraiinsoles.com.
Tips for Success
- Isolate the Movement: The most common error is moving the entire leg from the hip. Ensure your knee remains completely stable and the movement comes only from your ankle and foot.
- Focus on Control: Avoid using momentum. The effectiveness of this exercise comes from slow, deliberate muscle contraction, both when pulling inward and when returning to the start.
- Start with Light Resistance: Begin with a light resistance band to master the form. As you get stronger, you can progress to a band with more tension to continue challenging the muscle.
7. Heel Walking Exercise
Heel Walking is a dynamic exercise that directly targets the anterior tibialis muscle, the large muscle running along the front of your shin. By strengthening this key muscle, you improve its ability to control the foot's motion as it strikes the ground, helping to decelerate pronation and encourage a more neutral gait. It's a fundamental movement that counteracts the posterior muscle tightness often associated with collapsed arches.
This exercise is not just a simple stretch; it's a powerful tool for neuromuscular re-education. Its effectiveness in enhancing dorsiflexion (lifting the foot upward) has made it a standard component in various demanding fields. It is frequently used in stroke rehabilitation programs to combat foot drop, is a common drill in military physical training to build lower leg resilience, and is a core part of gait training protocols prescribed by physical therapists.
How to Perform the Heel Walking Exercise
Follow these steps to correctly engage the shin muscles, a crucial part of making this a beneficial foot pronation exercise.
- Starting Position: Stand tall with your feet hip-width apart. Maintain good posture by engaging your core and keeping your chest up and shoulders back.
- Lift Your Forefoot: Pull the toes and balls of both feet up toward your shins as high as you can, so that only your heels remain in contact with the ground.
- Walk Forward: Begin walking forward, taking small, controlled steps while staying on your heels. You should immediately feel the muscles on the front of your shins working hard.
- Cover the Distance: Walk for a set distance (e.g., 15-20 feet) or for a specific number of steps. Turn around and repeat the walk back to your starting point. Aim for 2-3 sets.
Tips for Success
- Keep Toes High: The primary goal is to maximize the contraction in the anterior tibialis. Consciously keep your toes pulled up toward your shins throughout the entire movement.
- Start with Short Distances: If you're new to this exercise, begin with just 10-20 steps to avoid over-fatiguing the shin muscles, which can lead to shin splints.
- Maintain Good Posture: Avoid leaning backward to compensate. Keep your torso upright and your core engaged to maintain balance and proper form.
- Progress Gradually: As you get stronger, you can increase the distance you walk or hold light dumbbells to add resistance, further challenging your lower leg muscles.
7 Foot Pronation Exercises Comparison
| Exercise | Implementation Complexity 🔄 | Resource Requirements ⚡ | Expected Outcomes 📊 | Ideal Use Cases 💡 | Key Advantages ⭐ |
|---|---|---|---|---|---|
| Short Foot Exercise | Moderate - requires motor learning | None | Strengthens intrinsic foot muscles, improves arch support | Injury prevention, physical therapy, all levels | Easy to perform anywhere, improves proprioception |
| Towel Scrunch Exercise | Low - simple movement | Towel (+optional weights) | Strengthens toe flexors and foot muscles, improves grip strength | Diabetes care, runner rehab, elderly balance | Inexpensive, visible progress, multi-muscle targeting |
| Single-Leg Balance on Unstable Surface | High - balance skill and equipment needed | Balance device (foam pad, BOSU) | Enhances dynamic balance, neuromuscular control | Sports performance, ACL prevention, vestibular rehab | Functional movement, reduces injury risk |
| Calf Raises with Arch Focus | Moderate - requires attention to form | None or weights | Strengthens calf and foot muscles, improves push-off mechanics | Achilles rehab, runners, dancers | Functional strengthening, easy progression |
| Marble Pick-Up Exercise | Low to Moderate - requires setup | Small objects (marbles) | Improves toe dexterity and intrinsic strength | Diabetic foot care, pediatric and post-surgical rehab | Fine motor control, measurable progress |
| Posterior Tibialis Strengthening | Moderate - requires equipment and form | Resistance bands/manual resistance | Strengthens primary anti-pronation muscle, supports arch | Flat foot treatment, post-tibialis repair, runners | Highly effective, evidence-based |
| Heel Walking Exercise | Low - easy to perform | None | Strengthens anterior tibialis, improves dorsiflexion strength | Stroke rehab, foot drop treatment, military training | Improves muscle balance, simple progression |
Supporting Your Progress: The Role of Insoles and Consistency
You've just explored a comprehensive toolkit of powerful foot pronation exercises, from the foundational Short Foot Exercise to the dynamic Single-Leg Balance. Each movement, whether it’s the focused grip of the Towel Scrunch or the targeted strengthening of the Posterior Tibialis, plays a unique role in rebuilding the muscular support system for your arches. By mastering these exercises, you are not just treating a symptom; you are actively retraining your body to maintain a healthier, more stable foundation.
The journey to correcting overpronation and alleviating related pain, like plantar fasciitis, is built on two core principles: building internal strength and providing external support. The exercises you’ve learned are the cornerstone of building that internal strength. They awaken and fortify the intrinsic muscles of your feet and the key supporting muscles in your lower legs, creating a natural, internal "insole" that supports you with every step.
The Power of a Consistent Routine
Consistency is the catalyst that transforms these individual exercises into lasting structural change. Sporadic effort will yield minimal results, but integrating these movements into your regular routine will create profound, long-term benefits.
- Build Muscle Memory: Performing these exercises 3 to 5 times per week helps your neuromuscular system adopt a more neutral foot alignment automatically.
- Increase Arch Strength: Just like any other muscle group, the muscles supporting your arch require regular work to become stronger and more resilient against the forces of daily activity.
- Prevent Re-injury: A strong, well-supported foot is less susceptible to the strain that causes conditions like plantar fasciitis, shin splints, and Achilles tendonitis.
Think of it as laying bricks for a new foundation. Each session adds another layer of strength and stability, gradually constructing a foot posture that can support you comfortably and efficiently.
Bridging the Gap with External Support
While you diligently work on these foot pronation exercises, it's crucial to acknowledge that building sufficient muscle strength takes time. During this rebuilding phase, your feet remain vulnerable to the same biomechanical stresses that caused the problem in the first place. This is where external support becomes an indispensable partner in your recovery.
Key Insight: Combining consistent exercise with high-quality supportive insoles creates a comprehensive strategy. The exercises build long-term strength, while the insoles provide immediate alignment and relief, allowing your muscles to heal and strengthen in an optimal environment.
A well-designed insole, like those from Samurai Insoles, acts as a supportive scaffold. It gently guides your foot into a more biomechanically correct position, immediately reducing the strain on your plantar fascia and other overworked tissues. This support doesn't just offer pain relief; it creates the ideal conditions for your strengthening exercises to be more effective. For instance, the 'Ninjas' model is specifically engineered to counter the effects of overpronation with its dynamic, springy structure. Meanwhile, 'Shoguns' provide enhanced control with a stabilizing heel counter.
By pairing your dedicated exercise regimen with the right external support, you create a powerful synergy. You are actively correcting the problem from the inside out while simultaneously protecting your feet from the outside in. This dual-pronged approach is the most effective path to not only managing overpronation but conquering it, allowing you to step back into your life with confidence and comfort.
Ready to give your feet the immediate support they need while you build strength? Discover how Samurai Insoles can complement your foot pronation exercises by providing the perfect alignment and cushioning for your recovery. Find your ideal pair and take the next step toward pain-free movement today at Samurai Insoles.


